Building your first AI agent with n8n is an exciting journey that combines the power of automation and artificial intelligence without the need for extensive coding skills. n8n is an open-source workflow automation tool that offers flexibility and ease of integration with various APIs and services. This makes it an ideal platform for creating intelligent agents that can perform tasks such as data processing, decision-making, and communication. In this article, we will guide you through all the essential steps to build your AI agent using n8n. From setting up the environment and connecting AI services to designing workflows and testing the agent, you will gain a clear understanding of the practical processes involved. By the end, you’ll be equipped to create your very own AI-powered automation.
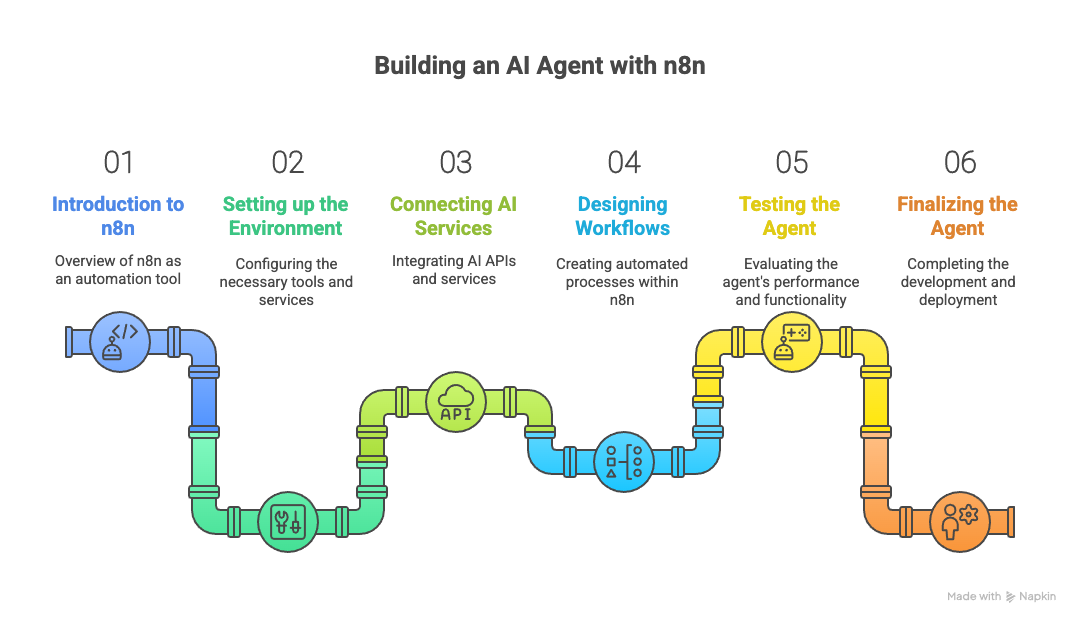
Setting up n8n and preparing your environment
Before diving into creating your AI agent, it’s crucial to set up n8n properly. You can deploy n8n locally using Docker or install it via npm for greater flexibility. Ensure that your machine meets the system requirements and has access to the internet for API calls.
Once installed, create an n8n account and familiarize yourself with the interface. The platform uses nodes that represent different actions or triggers, which you can drag and drop to create workflows.
At this stage, also prepare any API keys or credentials you will need from AI providers such as OpenAI, Hugging Face, or others. These APIs will handle the intelligence behind your agent, so securing access is a must.
Choosing and integrating an AI service
The core of your AI agent lies in the artificial intelligence service you connect to n8n. Popular choices include OpenAI’s GPT models for natural language understanding, or Hugging Face for specialized machine learning models.
To integrate an AI API:
- Sign up for the AI provider and generate an API key.
- In n8n, use the HTTP Request node or community-developed nodes for these AI platforms.
- Configure the requests to send data (e.g., text or prompts) and receive the AI’s output.
For example, with OpenAI, you will create a POST request to the completions endpoint, including parameters such as prompt, temperature, and max tokens. This setup allows your agent to process queries or generate content dynamically within workflows.
Designing your AI agent workflow
This is where your AI agent starts to take shape. In n8n, a workflow represents the series of actions the agent will perform.
Typical workflow design involves:
- Trigger node: This activates your workflow, such as an incoming webhook, scheduled time, or data change.
- Data processing nodes: Nodes like Set, Function, or Switch to manipulate data or operate conditions.
- AI integration node: The node that connects to your AI service to process inputs and generate responses.
- Output nodes: These can send results via email, messaging apps, store data in databases, or call other APIs.
For instance, a customer support agent can trigger when a new support ticket arrives, send the ticket details to the AI model for summarization or classification, then forward the results to the relevant team.
Testing and refining your AI agent
Once the workflow is created, rigorous testing is necessary. Run different input scenarios to verify the AI’s performance and node executions.
| Test case | Input example | Expected outcome | Result notes |
|---|---|---|---|
| Greeting message processing | “Hello, I need help with my invoice” | Agent responds with invoice support instructions | Passed: Correct prompt sent to AI, proper response received |
| Empty input handling | “” (empty text) | Agent returns a friendly prompt to request more info | Passed: Workflow handled empty input gracefully |
| Unexpected input | Random gibberish text | Agent asks for clarification or retry | Needs improvement: Sometimes returns irrelevant answers |
Based on results, refine your prompts, add validation nodes, or adjust AI parameters like temperature for creativity or max tokens for response length. You may also incorporate fallback logic to enhance reliability.
Deploying and scaling your AI agent
After testing is complete, you’re ready to deploy your AI agent.
Consider these important steps:
- Set up secure access: Use authentication for webhook triggers or API endpoints.
- Optimize performance: Monitor system load and API rate limits to avoid throttling.
- Automate maintenance: Schedule regular health checks and updates.
- Scale workflows: Clone or modularize workflows for handling increased volume or diverse functions.
With n8n’s scalability and AI flexibility, you can continuously improve the agent, integrating new services or expanding capabilities without rewriting the entire system.
Conclusion
Building your first AI agent with n8n involves several interconnected steps, from setting up the environment to deploying a fully functional workflow. Starting with a proper installation and acquiring API access, you integrate AI services that provide the intelligence for your agent. Designing a workflow that handles data and responds meaningfully allows you to automate complex tasks effortlessly. Rigorous testing helps fine-tune the agent’s behavior, ensuring it meets your specific needs. Finally, thoughtful deployment and scalability maintain the agent’s efficiency as demands grow. By following these steps, you leverage n8n’s user-friendly platform and powerful AI APIs to create customized, automated solutions that can transform your workflows and business processes.